Showing posts with label wardrobe refashion. Show all posts

Saturday, June 4, 2011

Simplicity 3835


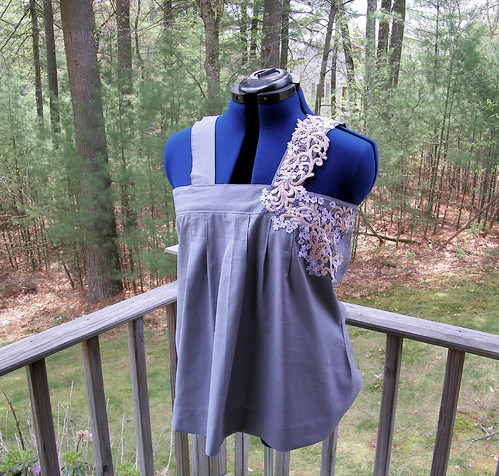
It all started when I found a piece of lace at a little antique shop for a dollar. I wasn't sure what I would do with it, but I couldn't leave it there. It was too pretty.
It was a DOLLAR!

I also had some Kokka fabric that I had bought at Purl Soho IN A SCRAP BAG NO LESS on a visit to NY last fall. It's a 90% cotton and 10% linen blend. Perfect for a summer top.

I had some lace leftover from another project. It was white, but I soaked it in coffee and then rinsed it to match the lace panel.

Voila!

Details:
Pattern: Simplicity 3835 - view 3. It is a Built by Wendy pattern that I have used before to make the tunic. It's a really flexible pattern with dress, tunic and top lengths and sleeve variations.
Fabric: Kokka, a blend of 90% cotton and 10% linen. I can't find a link to it, but it is slightly sheer.
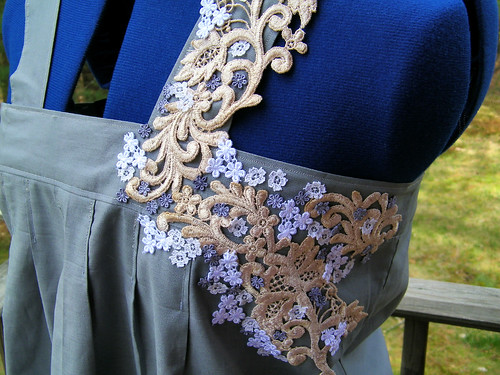
Mods: The lace is hand sewn into place on the sleeves and bodice.
New Techniques: I'm trying to learn how to make a more professional looking garment, so I used a french seam. This is a good tutorial for making a french seams from Colette Patterns.


Have a wonderful weekend!

Tuesday, January 18, 2011

Snow Flower Cardigan

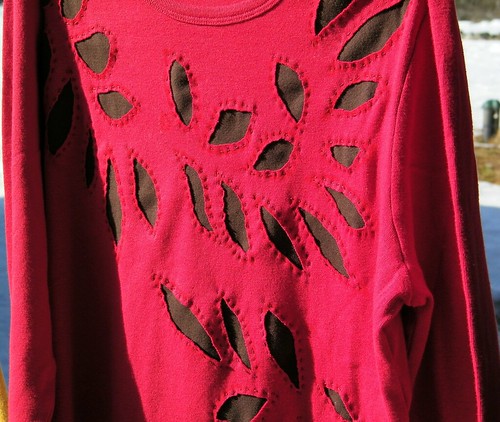
I saw this cardigan while perusing the ModCloth website and was inspired to make my own version.


Fall Flowers Cardigan

I started with a plain cardigan and t-shirt.


Traced leave shapes onto the t-shirt and cut them out.


Sewed the leaves down using a straigh stich down the center line.


Satin stitched the centers of the flowers.


That is all there is to it.


Here is the template for the leaves. Linking with Momma Go Round.

Sunday, April 11, 2010

Detail, details, details...

This was a fun detail to add to a plain cardigan. The tutorial and link for the lace can be found here.

I started with this cardigan.

I did have to remove all the beads from the shoulders of the cardigan first.


The lace came sewn onto tulle. In the tutorial the tulle is cut off, but I kind of liked how it looked so I didn't cut it off. What do you think?


Detail


Meet my new photographer. All my previous photographers were fired. Well actually they quit before I could fire them for cause. I guess they could see the writing on the wall. She is not bad with a point and shoot. She does whatever I ask her to do. She claims she was a model (something about hand knits). I just don't see it, but at this point I'm desperate, so I'll give her a chance.

Saturday, June 20, 2009

A new skirt for an old sweater

Back in May, I went to the Vintage Fashion and Textile Show. I picked up a few tablecloths that I thought would be pretty as a dress or skirt. I made a skirt out of one of them a few weeks back, but finally got around to taking pictures today.


This tablecloth had the prettiest scalloped border detail. It was so easy to make. I cut the tablecloth in half, sewed the edges together, added a bias binding to the top and inserted an elastic. It was that easy. Here is the detail of the border.

It was a pretty tablecloth, so I'm glad it worked out. I had a hard time cutting it.

The sweater is something I knit in March of 2008 (pre -blog). It is a free Drops Pattern. Knit with Classic Elite Four Seasons and US 10 circular needles.

Enjoy your weekend!

Tuesday, June 2, 2009

Summer Dress


I had this idea in my head to make a dress with a knit bodice and a sewn skirt after seeing this photo. I had some blue worsted weight yarn in my stash and found a pattern, and off I went. The photo in my header is the original color of the yarn. I did a picot edge to finish off the bottom hem and it was done in no time at all.


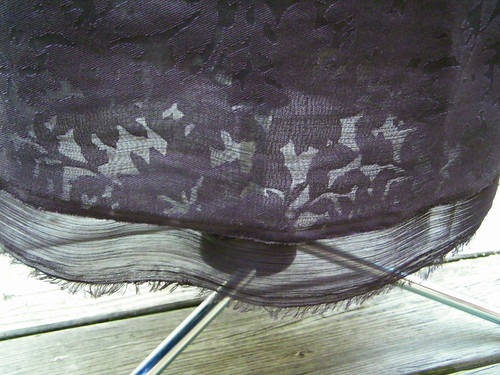
Now came the hard part. Trying to find some fabric that would match the yarn. Sounds easy enough. It was a nightmare, but not being one who gives up easily, I came up with the idea of dying the yarn black to match some fabric. Sounds easy enough. It was a nightmare. It took three dye baths to get it to the brown color that it is now. I used a brown lace fabric for the skirt and added an underskirt. I made the underskirt just a little longer so that it would show and left the edge unfinished.


To make the skirt, I measured my hips, added about 6 inches, and then measured the length adding a few extra inches for a casing. I made a casing at the top of the skirt leaving an opening, and threaded some elastic into the opening with a safety pin. After I tried on the skirt and adjust the elastic to were it fit best, I sewed the ends together. I then blind stitch hemmed the top to the skirt. If my instructions are confusing and you plan on trying this, I'd be happy to answer more detailed questions.

The Details:
Pattern for knit top - Drops 113-16 (free)
Yarn - Sugar'n Cream 100% Cotton, worsted, 2 skeins
Needle - US 7 circular
Modifications - shorted and with a picot edge

Please come back on Friday. It is my first year blogiversary, and I can't think of anyone else I'd rather spend it with. Oh, and I'm working on a giveaway too!

Saturday, May 16, 2009

Two t-shirts and an apron...

It sounds like the title of a movie! Doesn't it?

This week I went to the Vintage Fashion and Textile Show. If you are ever in the area the three times a year that they have this show, you should treat yourself. I bought some vintage fabric, kitchen towels, buttons and lace. All the linens were in wonderful shape and the vendors had them all cleaned beautifully. There were even gorgeous French fabrics from the 1800's, and lots of vintage clothing. Need I say anymore? It was fantastic.

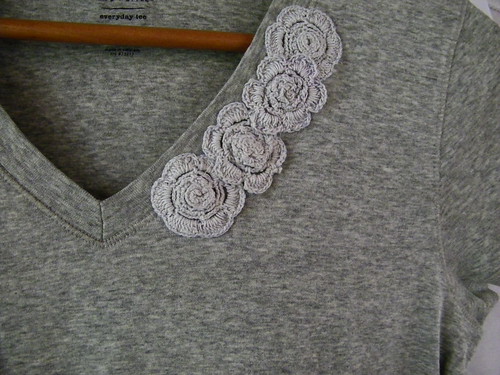
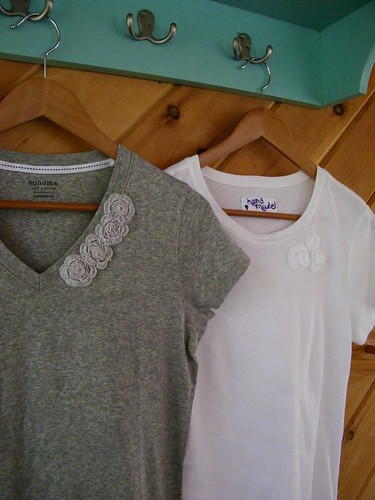
I made a couple of quick projects using some of my finds. First up a t-shirt that I added some crochet flowers to. Total cost $1.00.


Next, a t-shirt that I cut a 1 inch strip off the bottom and used the strip to make spider web roses. I zig-zag hemmed the bottom of the shirt for that ruffle effect. I used one of those Hot Pattern videos as a guide. Total cost zero dollars.


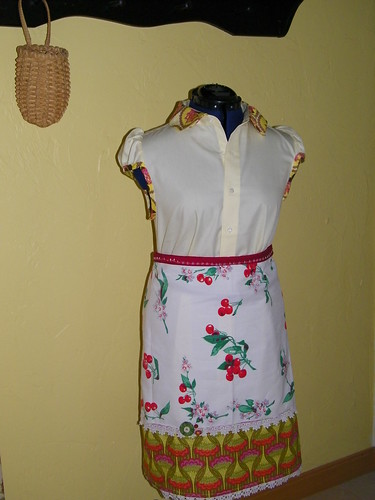
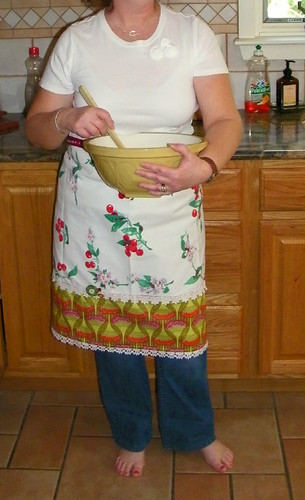
Last, an apron made with a vintage kitchen towel and some left over pieces of fabric and lace from other projects. I love how it came together. Total cost $3.00


Here I am playing house in my new outfit!


Have a great weekend!

Wednesday, May 6, 2009

Wardrobe Refashion

I took the Wardrobe Refashion Pledge for the months of May and June. I have been following the WR blog for a while and I am inspired by the members creativity. I've been wanting to learn how to sew my own clothes (that I would actually wear), so by signing up I'll be doing just that. It will be trial and error I'm sure, but I think it will be fun and challenging, and not to mention good for the earth and my wallet. Nothing to lose and everything to gain.

The inspiration for this t-shirt is based on American designer Phillip Lim's clothing line. The idea came from a Hot Patterns video. Did you know Hot Patterns has a whole bunch of great video tutorials on YouTube? I used a plain t-shirt that I wasn't comfortable wearing, because it was so long. It was perfect for this project. I cut 2 inches off the bottom, and zig-zag hemmed the raw edge. This gave it a lettuce edge look. I like that look. Then I took strips of the cut off hem and gathered them slightly. I sewed them around the neckline about an inch apart. I used some of the leftover fabric to cover some small buttons and added them in between the two ruffles. I really like how it came out.

I have to send a big thank you to Melynda at Country Girl Couture (she has a lot of great ideas), because I never would have found out about these Hot Pattern videos, if it wasn't for her.

Thursday, April 30, 2009

Spring Top Week


Rae from Made by Rae is hosting Spring Top Week. She has a wonderful ruffle top tutorial on the Sew, Mama, Sew website. It inspired me to make an Anthropologie inspired top that I saw on Grosgrain.


I followed Rae's tutorial leaving off the ruffles, and then added some lace that I had in my stash. I tea dyed some of the lace and then also dyed some pieces gray, and left some natural.

This is the detail up close.

I think I might make another one out of swiss dot material.


In the knitting department, I am working on a dress with this as the top part, and fabric for the skirt, but more on that soon.

Finally, there are some great DIY fashion blogs out there that I've really been enjoying lately. They all have wonderful tutorials on DIY fashion.

Thursday, February 26, 2009

Wardrobe Refashion - Part 2


I'm feeling a bit under the weather this week with the bad cold/flu that is going around. I haven't felt like doing much of anything except sleeping, but I will share some things that I finished up last week. I've been having fun with refashioning existing pieces in my wardrobe, or just adding embellishment to a t-shirt.


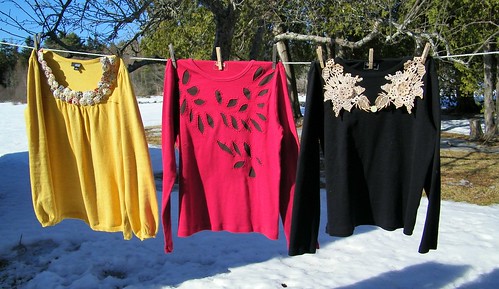
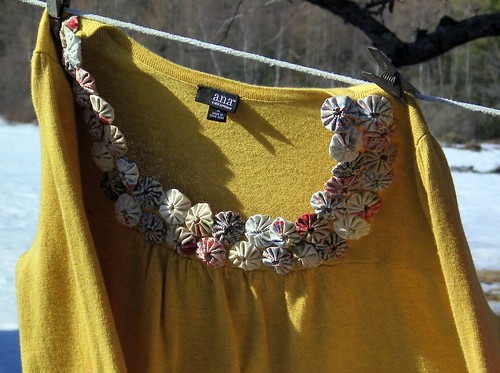
This yellow sweater is a cashmere/cotton blend (oh, okay, only 5% cashmere). It was only $8.57 after all the discounts, so I couldn't resist. The square neck is not a good look on me, so I added some yo-yo's to the neck line to round it off. I like the way it came out and have already worn it. My inspiration came from this book, by Katye Terry, I received as a Christmas gift.


This t-shirt was started back in November, and then was put aside during the holidays. It is inspired by the Alabama Stitch Book. They have a wonderful web-site too.


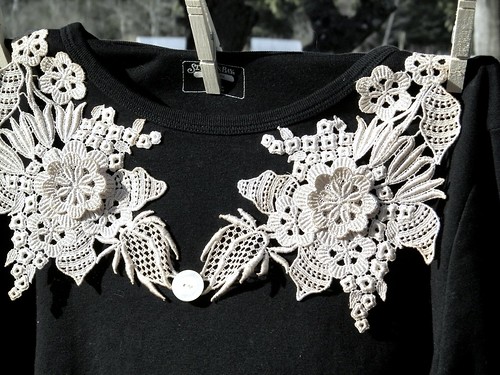
I added some lace and buttons to make a faux collar on this plain black top. It was inspired by this post from Emily Martin. I had bought the lace back in the fall when a local sewing store was going out of business. It was one of those impulse buys where I had no idea what I would use it for but I couldn't say no.

I'd really like to try using a men's dress shirt to make a women's top like this next. My husband just cleaned out his closet :)

Well, I'm going to go back to bed now. Hope you have a great weekend!

Monday, January 12, 2009

Refashion


I love the idea of refashioning something you already have in your closet, but never wear for one reason or another. I saw this idea to add a knit collar to a sweater on the blog Reserrection Fern. I had this brown cashmere sweater that had a small hole in the collar, but I couldn't get rid of it (after all it is cashmere). It was the perfect sweater for adding a new collar.

I sewed on some picot lace trim to the edge of the collar and then picked up and knit around the edge increasing on each side every few rows. I added some embroidered buttons.

And single crocheted some button loops.


Sweater = free
Yarn Plymouth Yarn Expression (3696)= 6.95
Button covers = 1.20 (with my 40% off coupon)
Total cost = $8.15

I love this idea. I see more refashioning in my future.